How TruNeg Works
Introduction
Many books, articles and videos have been published explaining and illustrating a multitude of approaches to solve the problem of the failure of the inverted image to make an acceptable “photographic” negative. However, to the best of my knowledge, there are none that explore the mathematics of the digital image, define a true reversal or digital negative and then apply a mathematical solution to the problem.
This article is based on the TruNeg digital negative program and follows the process through from the original photographic file, what happens when it is digitized and then inverted, and goes on to show how it can be corrected to make a genuine “photographic” negative.
The Maths of the Positive Image
The illustration below shows an eight stop photographic subject in half stop steps encoded in 16 bit RGB Color. The top line indicates the subject in traditional exposure zones, the next line is the RGB value at the beginning of each half stop and zone; the bottom line indicates the relative exposure in stops of each zone.
The series is an exponential function with each tone, or half exposure stop, from RGB 16 to 255, being 1.189 times brighter than the previous. The series continues on below RGB 16 but the tones are so dark and the changes so small they cannot be easily separated from each other, which is why RGB 16 is usually taken as the darkest tone that can be visually distinguished from black under normal viewing conditions.
The diagram below shows the inputs and outputs for the exponential step wedge as it would be shown in a curve dialog. ( for the sake of clarity the half stop intervals have been removed). Note that the outputs always remain an exponential function and if RGB 23 is twice as bright as 16, then 32 will be twice as bright as 23, 45 twice 32 etc. What changes when the file is inverted are the inputs.
Inverting the File
When the positive file is inverted, the photographic program subtracts the positive value from 255 , the tones flip horizontally and T10 is now the darkest tone and T1 the lightest and the exponential structure is lost.
All the tones from T6 to T1 are now squeezed into the one stop output “zone” RGB 180 to 255 and the three tones T7 to T10 are stretched out over the eight “zones” RGB 0 to 180.
Correcting the Inverted File
To correct the inverted file, if T9 is output at RGB 16 and T8 is output at 23, T9 at 32 etc. then the exponential structure of the step wedge is restored. That is, the single stop T10 to T9 of 75 units , is ouput as a single stop of 5 units from RGB 11 to RGB 16, RGB 11 being the next stop darker than RGB 16. Similarly, the single stop T9 to T8 of 52 units is output as one stop of 7 units. At the other end of the scale the single stop T2 to T3 of 7 units is output as a single stop of 52 units. The large difference between the positive and negative values at either end of the scale is caused by the large exponential factor involved with the photographic image.
Connecting the points builds a curve that creates a true negative reversal of the tones of any positive image.
Definition of a True Digital Negative
A digital negative is true when it outputs an inverted positive file as an exponential function.
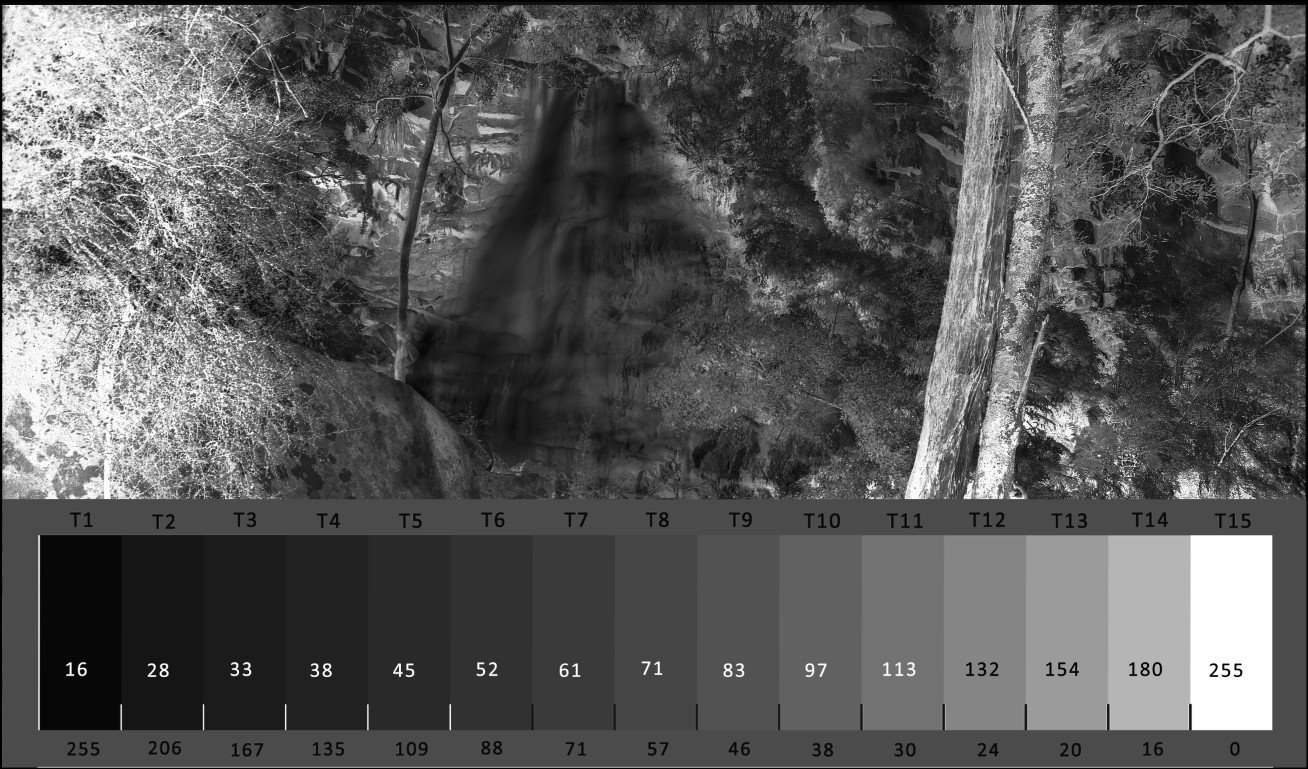
This can be tested before printing by measuring the tones of an inverted exponential stepwedge with the Eye Dropper tool or equivalent. If there is a constant multiple between the value of T2 and T14 in the stepwedge shown below then the negative is a true reversal.
Note that the value of the exponential factor is, within reason, unimportant and will vary with the contrast parameters of the printer and process.
Positive with 15 step stepwedge exponential factor of 1.24.
The inverted file.
True negative with exponential factor of 1.168 between T2 and T14 for a negative that produces just paper white at RGB 16 (T1) and just black at RGB 180(T14). In practice the factor varies slightly due to rounding the values to whole numbers.
The above curve could be described as the universal curve for the creation of a digital negative from a positive image and can be likened to a silver gelatin negative developed to its maximum gamma and density. Unlike bromide papers, most alternative processes have limited contrast control and the negatives need to be adjusted to the process being used.
If the definition of a good print is having a clean white and a satisfactory maximum density, then if we know the negative RGB values that make a print with a clean white and satisfactory maximum density, a curve can be calculated that fits the negative contrast to the material.
In practice, Photoshop limits the number of control points on a curve to 16 and each input must be 4 RGB or greater. This limits the number of tones to 15 and TruNeg bases all its calculations on the 15 tone or 14 step stepwedge below.
To find the white and black points TruNeg uses a 4x11 inch Control Negative. The website contains full instructions on how to use the Control Negative and make the negative correction curve that fits the printer and alternative photographic material.
The Control Negative
This not quite the end of the story, there is no guarantee that the most perfect negative will produce the print you want, to this end the TruNeg curve can be adjusted to shape the curve to fit different material characteristics and/or personal likes and dislikes. This is done by visual assessment of a test print made with the “true” curve and amending the offending tones as described in the instructions.


